
A worn or damaged roof does not always need full replacement. In many cases, a smart roof repair plan can restore performance and extend the life of your roof coating. That is one reason many owners choose silicone-based coatings. When the roof has the right silicone coating, small problem spots can often be addressed without tearing off the whole system.
Knowing how to repair a silicone roof coating the right way matters. A rushed patch can fail early or leave weak areas that invite leaks. A careful approach helps the roof stay sealed, protects the building, and supports long-term waterproofing. When done correctly, silicone repair work blends into the surrounding area and helps preserve the rest of the system.
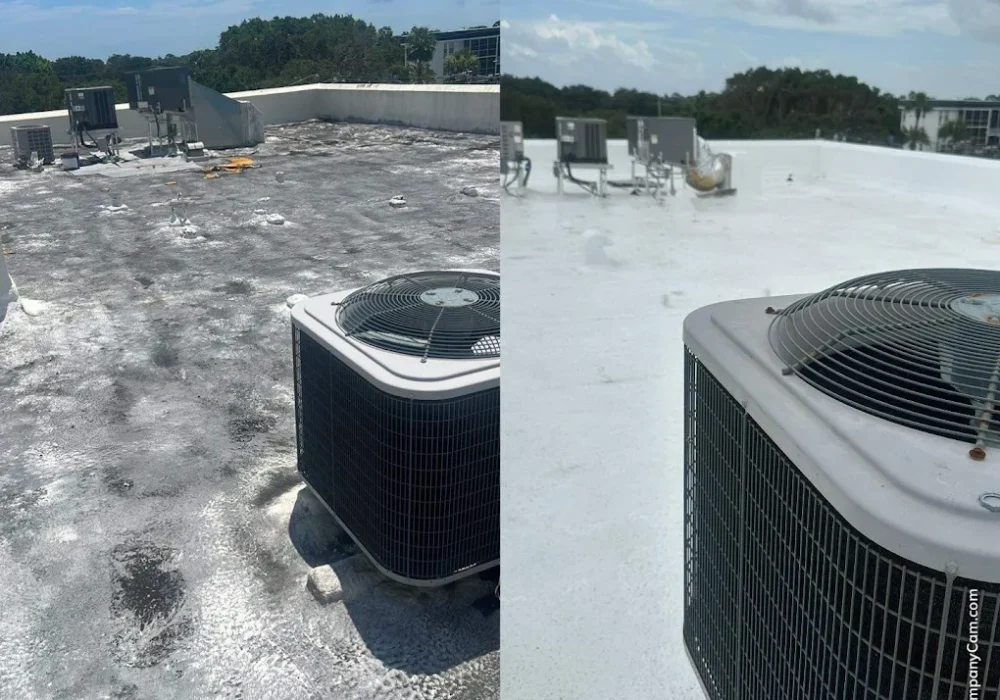
Start By Inspecting for Roof Damage
Before any repairs begin, inspect the roof closely. Look for punctures, worn seams, splits around penetrations, open laps, ponding areas, and other forms of roof damage. Common issues include ponding water, foot traffic, stress around penetrations, failed seams, old patchwork, and poor prep from a previous repair. If you only treat the exterior and ignore what caused the damage, the same area may fail again.
Pay attention to each area and mark it clearly. The size and type of impairment will tell you whether you need a simple patch, reinforced detail work with fabric, or a larger restoration section. This is also the time to confirm whether the surrounding existing silicone coating is still bonded well. If the field of the roof is stable, targeted repairs may be enough. If wear is widespread, partial replacement or broader recoating may make more sense. It also helps to separate cosmetic wear from active roof problems. Minor discoloration or light wear may not mean the system needs major work. Open splits, soft spots, recurring leaks, loose edges, or areas that stay wet deserve a closer look before any material is applied.
Clean and Prepare the Area for Coating
All successful silicone coating repairs depend on preparation. The repair area must be dry, sound, and clean before any new coatings are applied. Dirt, loose debris, chalk, oils, and biological growth can all interfere with adhesion. Even though silicone adheres well in many conditions, no contractor should skip prep. Before starting, gather the materials needed for the repair so the work can move without interruption. In most cases that includes a broom or blower, water or cleaner, an abrasive pad or scotch-brite tool, compatible materials, reinforcing fabric, and the applicator recommended for the product. Safety equipment also matters, especially on a roof with slope, edge exposure, or slick areas.
Start by washing the area and allow it to dry fully. If the area has dirt embedded in it, use the abrasive tools to lightly scuff the spot so the new material can grip better. The goal is to prepare the area so the fresh silicone bonds well to the silicone that’s already there. Compatibility is important here. The repair material should be made to work with the existing material already on the roof. Using the wrong product over the wrong system can create adhesion problems, even if the area looks clean and ready.
Know When a Small Patch Is Enough
Not every issue on a silicone roof coating needs a large repair buildup. If the damage is light and isolated, you may be able to just apply another thin layer over a properly prepared section. This works best when the underlying systems are intact and the old system is still firmly attached. A small patch usually makes sense when the problem is limited to a tight repair area and the surrounding roof is still in good condition. That may include minor erosion, a shallow scrape, or a small worn section where the coating has thinned. It does not usually apply when it has trapped moisture, repeated leaks, movement in the substrate, or signs that the system is failing below the top layer.
Use Fabric Where Reinforcement Is Needed
When the silicone that’s already there has deeper damage or damage located at a seam, flashing edge, drain, penetration, or transition, reinforcement matters. This is where fabric becomes important. Many professional coatings rely on it to strengthen vulnerable points on a roof and help the wet material bridge movement.
To repair these areas, apply a base layer of silicone coating to the prepared spot, embed the fabric, and then add more silicone over the top. It should be fully saturated and smoothed out so there are no wrinkles or voids. Once cured, that reinforced section becomes a stronger part of the overall roof coating system. It should extend past the visible damage so the repair ties into solid material around it. It also needs to sit flat, with no wrinkles, fishmouths, or dry pockets. If it is not fully embedded, the repair can end up with weak spots that shorten the life of the coatings.
This method is common on penetrations and detail areas because these parts of the system usually take more stress than the open field. Using fabric also helps when the roofing has cracks, splits, or recurring issues that need more than a quick pass. For many roof coatings, reinforced details are one of the most important parts of long-term performance.
Match the Repair to the Roof Coating System
The way you approach a repair may differ depending on the substrate below the coatings. Some systems are over metal, some over modified bitumen, and some over single-ply assemblies. Because silicone is a fluid-applied material, it can work across different systems, but the repair still has to match the condition below. This matters because not every roof system responds the same way to moisture or movement. A metal roof may have different trouble points than modified bitumen or single-ply membranes. The repair should match the condition of the roof below the coatings, not just the appearance of the top.
If the substrate is wet, loose, or failing, no top-side patch will solve the problem. If the underlying installation was weak, the visible issue may only be part of a larger problem. That is why experienced contractors inspect below the failed system when needed, not just the top layer. If the insulation is wet, the substrate is soft, or the roof deck has been compromised, a superficial repair will not fix the real problem. In that situation, part of the roof may need to be opened up and repaired before new silicone coatings are installed. That step is often what separates a lasting repair from a temporary patch.
Apply the Roof Coating Correctly
Weather plays a big part in whether a repair holds up. The roof should be dry, the repair area should be free of trapped moisture, and rain should not be expected before the material has time to cure. It is also smart to follow the product guidelines for temperature and application conditions so it can bond and cure the way it should. Once the area is prepped, dry, and ready, the next step is to apply the repair material at the right thickness. The new silicone coating should extend beyond the damaged section so the transition is smooth and watertight. The roof should be evenly covered, and the material should be coated with care so there are no pinholes, fishmouths, or voids.
The new coating should not stop right at the edge of the visible problem. It should extend into sound material around the damaged area so the repair area blends into the surrounding area and creates a stronger seal. That helps prevent the edge of the patch from becoming the next failure point. Good coatings are not about dumping on excess product. They are about using the right amount in the right place. Too little leaves weak coverage. Too much can create slow curing or uneven results. A proper repair ties into the surrounding system, strengthens the weak point, and supports ongoing water protection.
Let the Fluid Applied Coating to Cure and Reinspect the Roof
After the material has been sprayed, give it time to cure based on weather conditions and product instructions. Make sure the roof is sealed at the edges, the fabric is fully encapsulated, and the repaired spot feels integrated with the surrounding silicone coating.
This final review matters because even well-made repairs can fail if edges lift or hidden moisture remains. Reinspection also helps catch nearby trouble spots before they become larger issues. On aging roof coatings, proactive checks can save money and delay major work. Once the repair has cured, ongoing maintenance still matters. It should be checked after major storms, heavy service traffic, or seasonal weather changes that can stress coating systems.
When Repairs Make Sense and When They Do Not
A quality roof coating can often be repaired successfully when problems are local and the rest of the system is still in good shape. That is one of the biggest advantages of silicone roof coatings. It allows targeted work without disturbing the entire assembly. For many owners, that makes coatings a practical option for extending service life. For smaller surface-level maintenance, our DIY silicone coating application tips can help you understand the basic prep, safety, and product considerations before touching the roof.
There are also times when it is smarter to bring in a contractor instead of trying to keep patching the roof. That includes large repair areas, active leaks that keep returning, widespread ponding, soft spots underfoot, or any case where the source of the problem is not fully clear. When the condition of the roof is uncertain, guessing can make later repairs more expensive. If wide sections of the roof are saturated, if adhesion failure is spreading, or if it has reached the end of its useful life, patchwork may not be enough. In that case, a broader restoration plan for the roof may be smarter than isolated repair work. The goal is always to choose the option that protects the full system and keeps the property dry.
Proper Silicone Roof Repairs Extend the System’s Life
Learning how to repair roof coatings starts with understanding the condition of the roof, the source of the leak or wear, and the strength of the surrounding material. Proper silicone coating repairs are not complicated, but they do require careful prep, the right detail work, and a clear understanding of how coatings perform over time. That is why the best roof repair decisions are based on condition, not guesswork. If the existing system is still sound and the impairment is limited, a focused repair can extend the life of the system without major disruption. If the problems are broader, a professional assessment can help determine whether repairs or replacements make the most sense.
When the roof is properly prepared, clean, reinforced with fabric where needed, and sealed with the right silicone coating, the roofing system can continue performing well. That is why many property owners choose silicone coating solutions in the first place. They offer flexibility, strong waterproofing, and repair options that can add years to a roof without unnecessary disruption.
Experience with Silicone Roofing
If your flat or low-slope roof is showing leaks, worn coating, or patch areas that keep coming back, now is the time to get it evaluated by a contractor who understands what actually makes a roof repair last. Whiting Roofing helps property owners determine whether their industrial or commercial roof needs a targeted silicone coating repair, a broader restoration plan, or a more serious correction beneath the surface. With more than 40 years of experience in South Florida, in-house crews, and manufacturer-backed expertise, Whiting Roofing gives property owners clear answers, quality workmanship, and a practical path forward. Contact Whiting Roofing for a free inspection and quote before a small issue turns into a much larger roofing problem.